")
Animal Crossing: New Horizons tips are handy to have by your side as you navigate island life. Those first few days in the game can be a bit bewildering, especially if you’re new to this most eccentric of series, so here are a few handy Animal Crossing New Horizons tips to help you make the most of your first few days as an islander. This guide will list what you should know when getting started in Animal Crossing: New Horizons, including things you can’t change after you make your island, how to reroll your island and villagers, craft tools, day by day living, and all the tips that can help you get started.
Table of Contents
Remember that progress is gated by real-life days
If you’re new to Animal Crossing, or it’s been a spell since you last hung out with Tom Nook and co, it’s easy to forget that this is not a game that you can rush. Progress, especially at first, is doled out slowly, restricting access to certain activities/items/buildings according to how many real-world days you’ve spent in the game. Take it easy folks, there’s no rushing island life.
Optimize Your Inventory
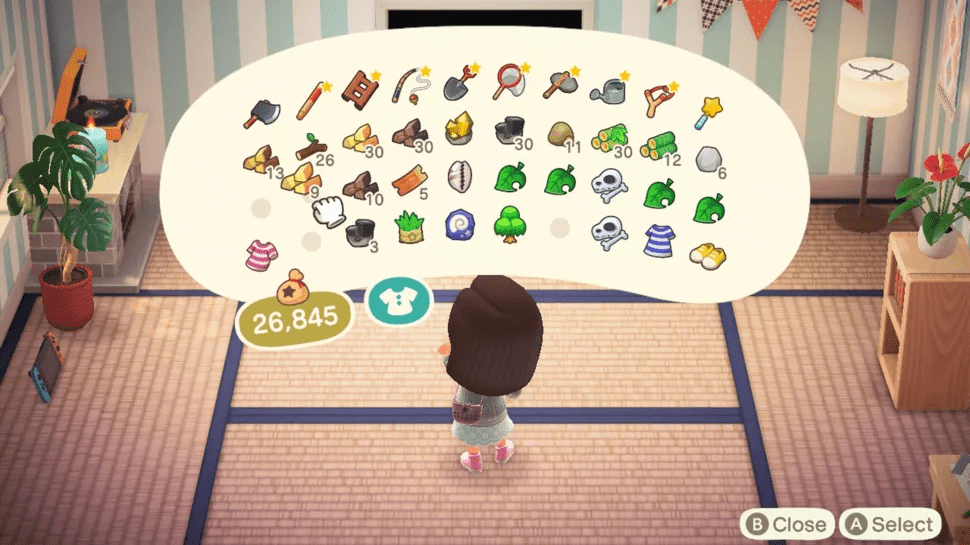
Use your Nook Miles and the NookStop to unlock the maximum inventory capacity of 40 item slots to get more room in your pockets. I like to keep certain crafting items on me at all times so I can make a new bug-catching net or fishing rod at a moment’s notice. Aside from tools, I always have iron nuggets, wood, softwood, hardwood, stones, and tree branches on hand. Several items stack, but once you get 30 pieces of something like wood, it will automatically start using a new inventory slot.
Collect DIY Recipes
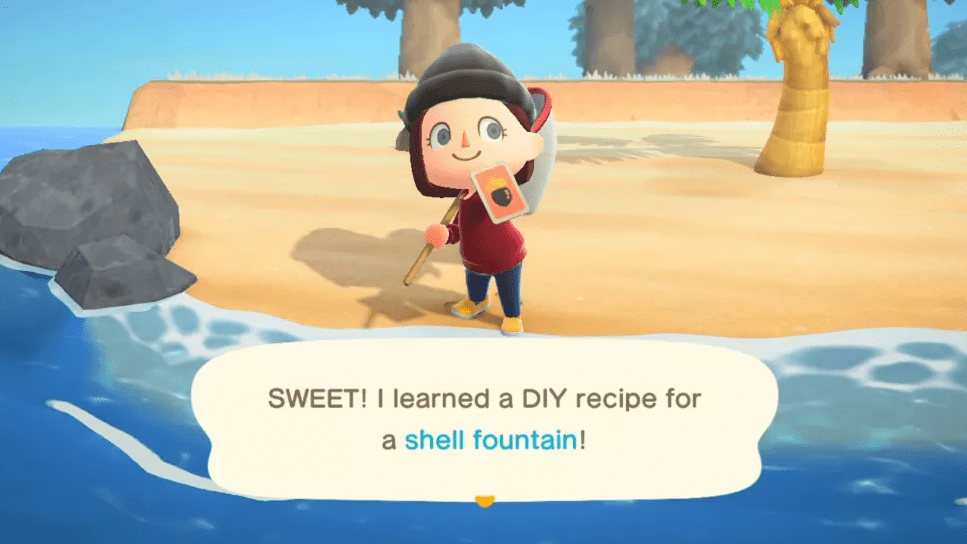
A major component of New Horizons is gathering up new recipes to craft out of materials you can collect all over the island. Some you can get from recipe books sold by Timmy or the Nook Miles Store, and some are situational – like fishing up trash or talking to a villager after getting stung by wasps.
- Each day, you’ll find at least one message bottle along the beach containing a random recipe. *You can also visit your villager’s homes once they upgrade to houses, and if you see them crafting at their own workshop – talk to them and they’ll give you the recipe for whatever you’re working on.
- Tired of taking too long to craft items? Mash the A button to make the process go faster!
- Always make time to shoot down balloons with your slingshot (listen for the gusting wind), as the presents they hold can contain almost anything – including more recipes!
- Recipes need all sorts of resources and materials – some of which you may not realize can be used, like weeds, wasps nests, and seashells.
- Not all recipes can be customized, but once you unlock the customization workshop, you can alter the color of many DIY items, and even add patterns to some of them.
- Check-in on your neighbors once they’ve upgraded to houses. They’ll sometimes be working on a recipe you don’t own.
- Once you unlock the campsite, Amiibo visitors will request an item. They’ll give you the DIY recipe if you don’t have it.
Unlock Tools
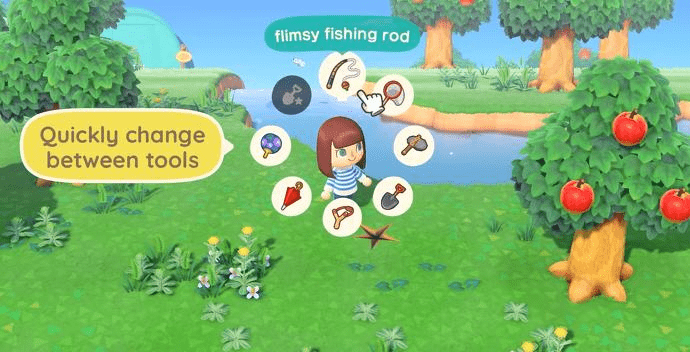
You don’t start Animal Crossing: New Horizons with all the tools you need to explore your island. Here’s a super-quick guide on how to unlock them, or visit the individual Tools Guide pages for more information on each:
- Fishing Rod and Bug Net – Speak to Tom Nook in Resident Services for his DIY Workshop
- Slingshot – Purchase the DIY Recipe from Timmy
- Stone Axe – Give Tom Nook at least two bugs and/or fish
- Watering Can – Give Tom Nook at least four bugs and/or fish
- Shovel and Vaulting Pole – Give Tom Nook five bugs and/or fish and speak to Blathers once he arrives
- Ladder – This comes much later. Keep following Tom Nook’s tasks and pay off your tent debt.
Pay off your moving costs ASAP to unlock new options
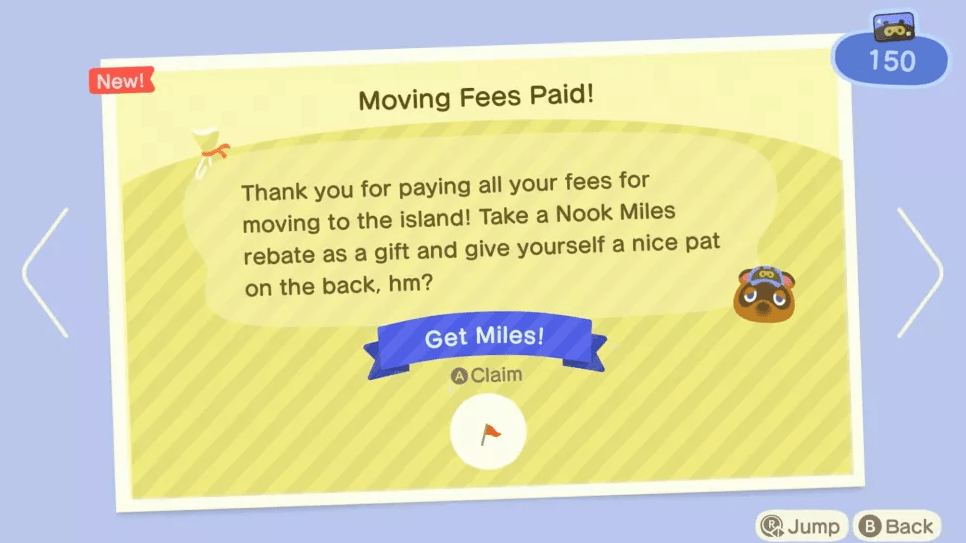
On your first full day on your new island, Tom Nook gives you a rather large bill to cover all of your moving costs. Thankfully, you can pay it in Nook Miles – and a fairly reasonable 5,000 Nook Miles at that – and we’d advise making it the first thing you do on the island. Once you’ve paid off Mr. Nook, you’ll unlock a whole load of new options. Firstly, you’ll be able to take out a new loan, which will automatically let you upgrade from a tent to a house. It’s a loan of 98,000 bells, but your new home will be built by the next morning, and then you can start repayment. This unlocks the ability to hoard items in your home’s in-built storage, which is very handy indeed. But, that’s not all. You’ll also unlock the Nook Miles Rewards at the Nook Stop terminal in Residents’ Services, which opens up a whole load of items, recipes, and more.
Plus, once you’ve taken out your new home loan, you’ll unlock Nook Miles+, which are a selection of five straightforward tasks that constantly replenish as a way of earning Nook Miles more quickly and easily. For example, these range from catching five fish or selling 10 shells, to chatting to three neighbors or planting one tree.
Collect Resources

Not only will collecting resources earn you Nook Miles (the new achievement-based currency), but you’ll also be preparing yourself for future activities. You’ll need resources like rocks and tree branches to make your first tools. The first level of tools break somewhat frequently, so you’ll need a lot of resources to keep going. If you run out of resources for crafting tools, Timmy sells some tools.
Here are resource collecting tasks we recommend doing to get the most out of your island early on:
- Clear weeds near the base of trees. If too many cover the ground, items that would need to drop there will either bounce far away or disappear entirely.
- Shake trees from the front (definitely not behind) with a bug net in hand. Wasps sometimes drop from trees, and if you’re standing in front of the tree, you can catch the wasp by hitting “A” right after your character stops being stunned. This is the easiest way to catch them. If you’re behind the tree, you might accidentally hit the tree and get stung. You can also evade wasps by running into a nearby building. Wasps sell for a lot of Bells, though, so you’ll want to catch them! If you do get stung you can buy Medicine from Timmy or talk to another resident to get the recipe to craft it with the wasp nest and three weeds. If you don’t find wasps, you’ll sometimes get tree branches, an item, bells, or the fruit hanging in the tree!
- Plant some new trees! Once you’ve got a shovel good to go, use some of the fruit you’ve either been sent or gathered to plant new fruit trees. Dig a hole where you’d like the tree, and while facing the hole with your shovel out, open your inventory and select the fruit you’d like to plant. You’ll see an option for “Plant 1.” This step is more so future-proofing your island for more resources rather than getting you new ones, but it’s important!
- Craft a flimsy axe and start hitting trees! You can hit each three times to earn wood. You can get normal wood, hardwood, and softwood. You’ll need all three for various things in the coming days, so stock up!
- Hit rocks with a shovel, but strategically. Position yourself next to the rock. Dig a hole immediately behind you then another to the right or left of you. This may seem silly, but doing this ensures you won’t push yourself away from the rock too quickly while you’re striking the rock with a shovel. If you don’t hit the rock in succession quickly enough, you’ll stop earning resources from the rock. Get closer to the rock as needed. You’ll get stone, clay, iron nuggets, and even gold nuggets if you’re super lucky! You can earn a maximum of eight items from each rock.
Maximize Your Nook Miles
You’re probably visiting the NookStop inside your Resident Services Center once per day to rack up those sweet, sweet bonus miles. Here’s another trick: Redeem your Nook Miles from the NookPhone app as soon as you earn them. Once you redeem bonus miles, you’ll receive a new task, and it might be for something you were about to do anyway. It’s a simple step that’ll help you accrue more efficiently.
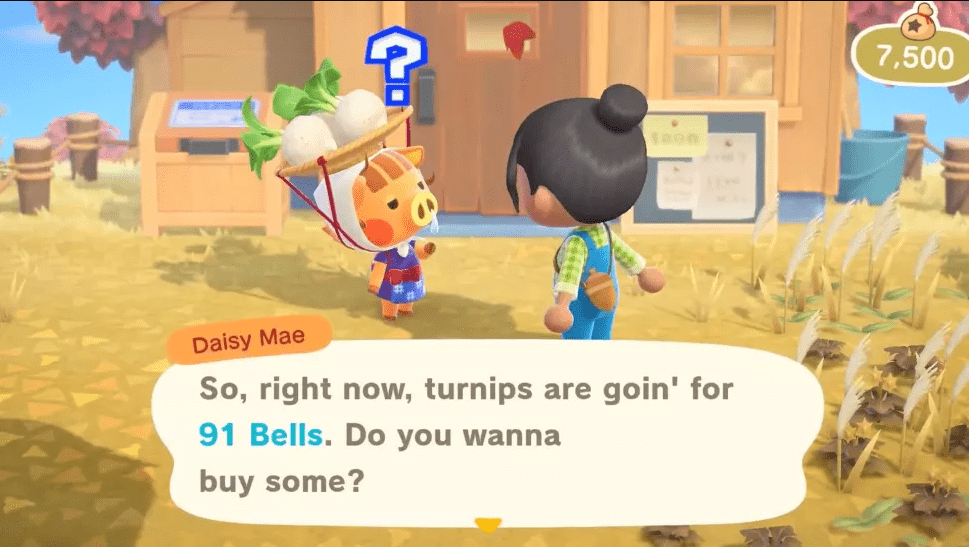
Nook Miles Tickets are a (temporary) escape and a goldmine for resources
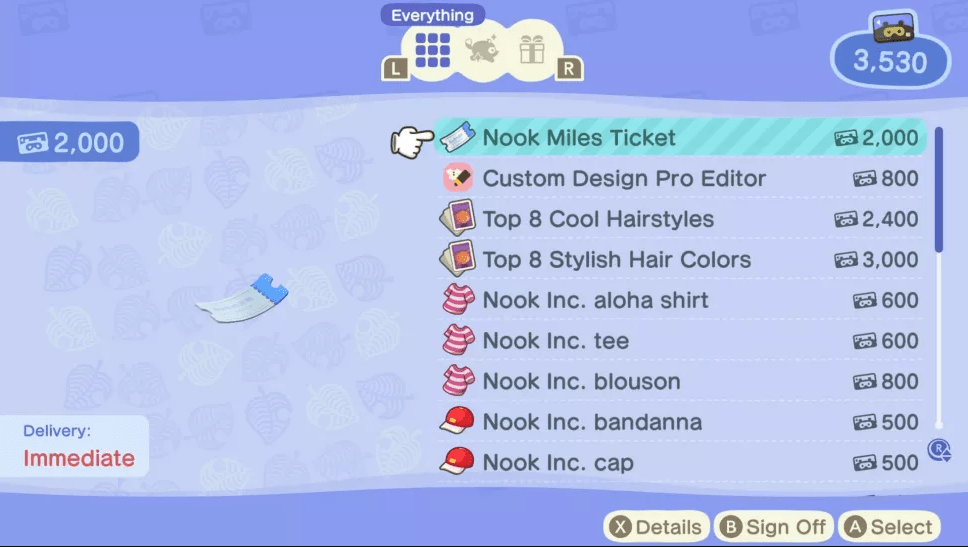
Yes, Nook Mile Tickets are an absolute godsend. For 2,000 Miles, you can buy one of these tickets that you use to travel to other – completely random, procedurally generated – deserted islands. For every ticket you use, you’ll go to a different island, which will each have its own range of fruit, flowers, trees, and more. You can bring anything you find back with you to your own island, making it a fantastic way to gather sellable items and crafting materials. Plus, as your own island will natively only grow one type of fruit, it’s by doing this that you’ll slowly evolve your own island’s ecosystem.
What’s even more exciting about these islands is that sometimes you’ll find a friend there too, who you can speak to and potentially invite them to your island if you’d like.
Be careful with your axe
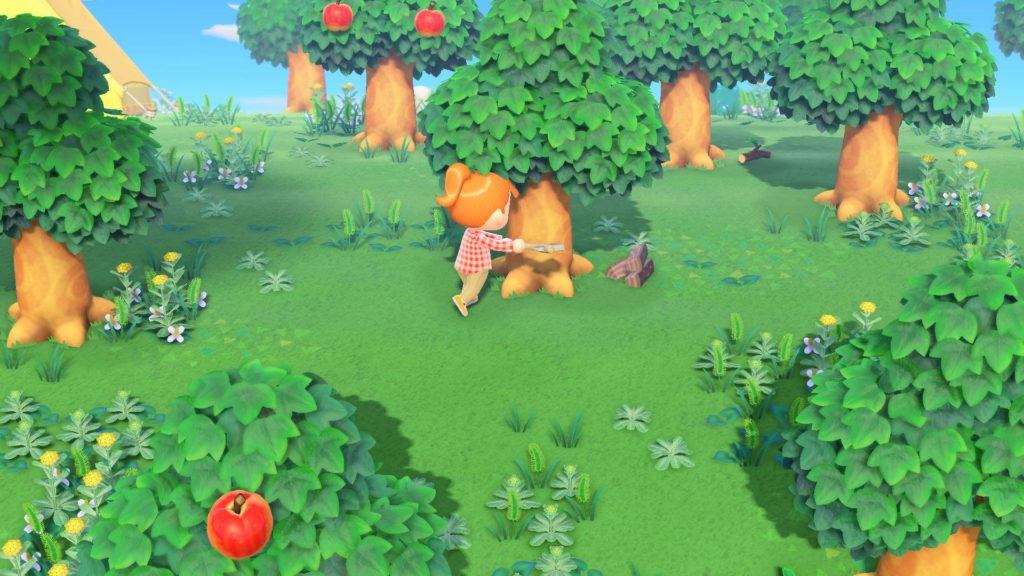
Once you start upgrading your tools, you’ll notice that they somewhat increase in power – particularly when it comes to the axes. You’ll quickly get access to the ‘flimsy axe’, the ‘stone axe’ and just a very simply named ‘axe’. Don’t be fooled though, as the axe is impressively formidable. While the stone axe and the flimsy axe will shake a tree enough to set free the softwood, hardwood and normal wood, but leave the tree intact, the axe will carve straight through the tree. If you want to chop down trees, you’ll need the axe – and stumps do encourage more wildlife to frequent your island – but just for wood, it’s the stone axe max.
Go for a swim
The latest update to Animal Crossing allows players to hop into the water around their island and dive below the surface to investigate bubbles. In much the same way as you can find unique fish and insects around your island, you can now scoop up a variety of marine critters out at sea — whether to donate them to Blathers at the museum, or to sell them for a quick bell.
Make and use fish bait
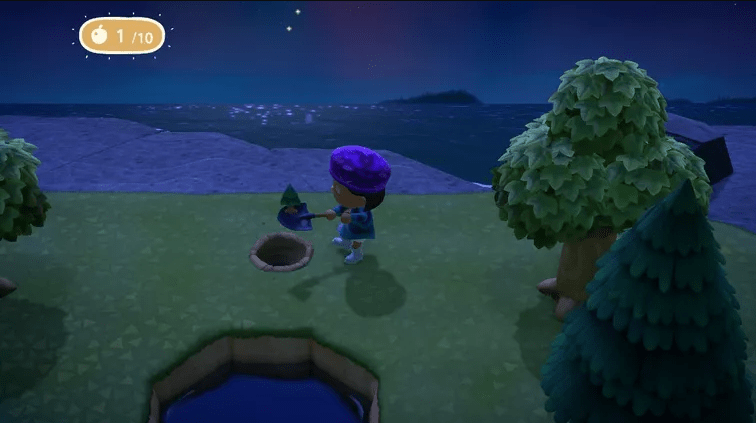
As you go for long, peaceful walks on the beach, you might notice little jets of water spraying up from the sand. When you see them, get out your shovel and dig! Manila clams are hiding under the sand, and you can craft them into fish bait. When you’re angling for rare fish, you can use that bait to give yourself better odds, luring in more fish in specific spots like mountain streams and at the end of the pier.
Look out for balloons and bottles to get free stuff
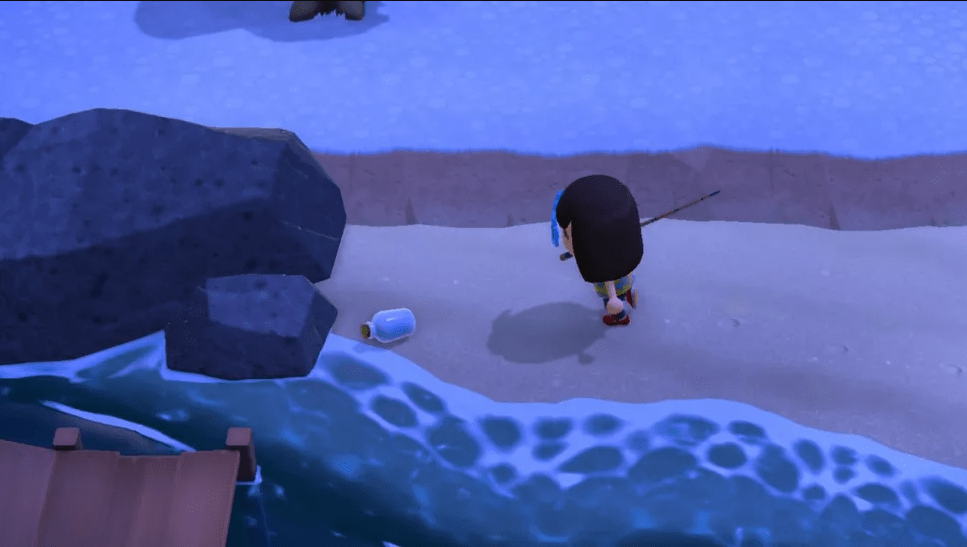
There are two regular items that will arrive on your island that you should look out for. Once or twice a day you can find little bottles that wash up on the beach. These will always contain a letter from a random source, and a crafting recipe. They’re random, so there’s no way to know what kind of recipe you’ll get, but if you already have the recipe in your list, you can always sell it for a few Bells or gift it to another islander.
Another great source of new items, recipes, and often Bells, is the little presents that will float through the sky attached to balloons. You’ll know there’s one in the vicinity because you’ll hear a very clear whooshing wind sound. Push up on the right joystick until you can see the skyline, and give it a scan for a floating balloon, or look on the ground for a moving shadow. You’ll need the slingshot to shoot it down – the recipe for which is available at Nook’s Cranny or from Tommy in Residents’ Services – but when you do there’s a present in it for you. Just watch that there’s no danger of it falling in the river – although there’s a Nook Mile Reward for doing just that.
Find every type of fruit
The first fruit you find on your island — I found pears — sells for 100 bells a piece. But as you get more “foreign fruit,” you can sell it for as much as 500 bells each. The problem is, finding those pesky fruit trees can be a challenge, even if you spend all your Nook Miles traveling to other islands in pursuit.
Since every player starts with different fruit on their island, though, one of the easiest ways to get all six types of trees growing at home is by sharing. If you have friends playing the game, you can travel to their island. If not, you can always look on Reddit for strangers sharing public codes so you can get a few new fruits to grow. And remember, if you don’t have a Nintendo Switch Online subscription, you can always get a 7-day free trial to find what you need, then cancel before you get charged.
Use Fruits for Super Powers
You’ve probably already figured out that eating a piece of fruit and then hitting a rock with your shovel or stone axe will break a rock, but did you know that the same action can help you move trees around? Gone are the days of chopping and replanting. Once your fruit-eating powers have been activated, you can use your shovel to dig up a tree. It’ll get stashed inside your pocket for easy planting.
Don’t Waste Resources
Your Deserted Island is practically bursting at the seams with trees, rocks, and weeds that can be used as crafting ingredients and sold to Timmy and Tommy.
- The simple act of crafting an item can double its value over the price of the resources it was made from
- Once you help Timmy and Tommy build Nook’s Cranny, they’ll offer to buy one “hot item” per day at double its normal value, which will always be a random crafted item. This means you can stand to make four times as much money than selling weeds of branches for their base value!
- Use the Nook Miles Ticket to travel to a Mystery Island if you find yourself running short on supplies, as there will be plenty more trees and rocks to mine for resources.
- If you’re running low on island resources, consider purchasing a Nook Miles Ticket to visit a deserted island.
- When you’re crafting, tap “A” twice and hold it down to make the crafting animation faster.
Talk to other islanders
It’s easy to get lost in your routine, running around to find the four fossils that appear every day or trying to find that one rock that gives out bells every time you strike it with a shovel, but while you’re running your errands don’t forget to stop and chat to other villagers every once in a while! If you’re ever lost for something to do, speak to Tom Nook and he’ll make it perfectly clear what’s needed to progress further, or simply talk to other islanders as you come across them.
They’ll give you DIY designs, clothes, and items to help you pretty up your island, all for nothing but a few seconds of your time. You might even end up becoming friendly with a few – and they might have a few surprises in store as they set you off on some challenges of their own.
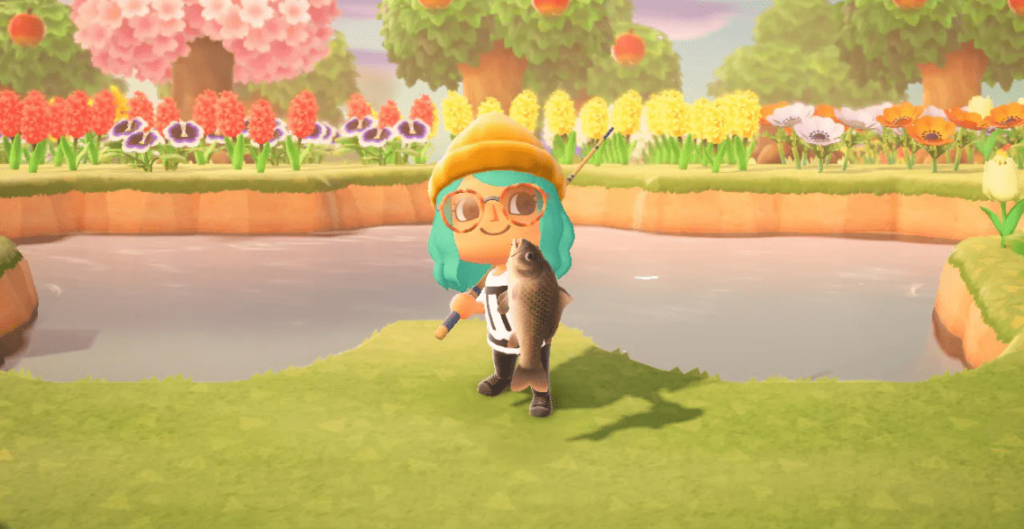
Catch all the fish and bugs
Another early tip: Catch every animal you see — which pretty much consists of fish and bugs. Keep an eye on flowers for stinkbugs and mantises, snag butterflies in the groves, and shake trees and rocks to find pill bugs and spiders. Here’s how my colleague caught the elusive stringfish.
As soon as you craft your first bug net and fishing pole, start handing over your collected critters to Tom Nook. Sure, you could sell these creatures to Timmy and Tommy, the island’s resident traders, but Tom Nook will send each unique discovery to his friend Blathers the owl, who lives off-island. Long story short, after enough donations, Blathers the owl will come to build a museum on the island and set you on to a much larger collection project, opening up the game considerably.
Take advantage of special visitors
Within the first few days of your island adventure, you’ll likely come across a unique visitor — such as Gulliver, the seagull asleep on the beach, or Wisp, the easily frightened ghost. Each of these visitors will teach you something, sell you something or send you on a short mission. These missions will earn you unique item rewards.
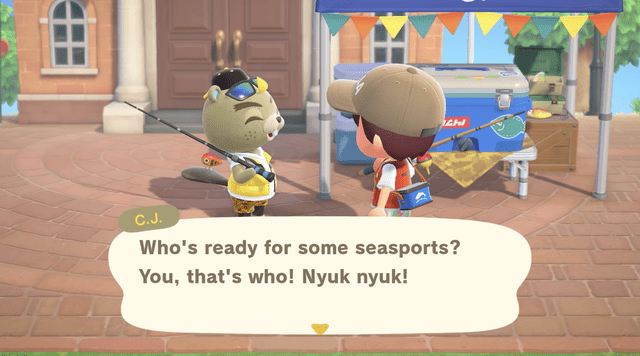
My personal favorite visitor so far is C.J, a beaver-blogger who loves to fish. He’ll ask you to catch special fish for him, order fish decorations for you (from another unique visitor), and pay you extra for any fish you sell him. In a single day with C.J., I ordered a handful of fish decorations to hang on my walls and made nearly 60,000 bells just angling as usual. It was a good day.
Customize Your Clothing
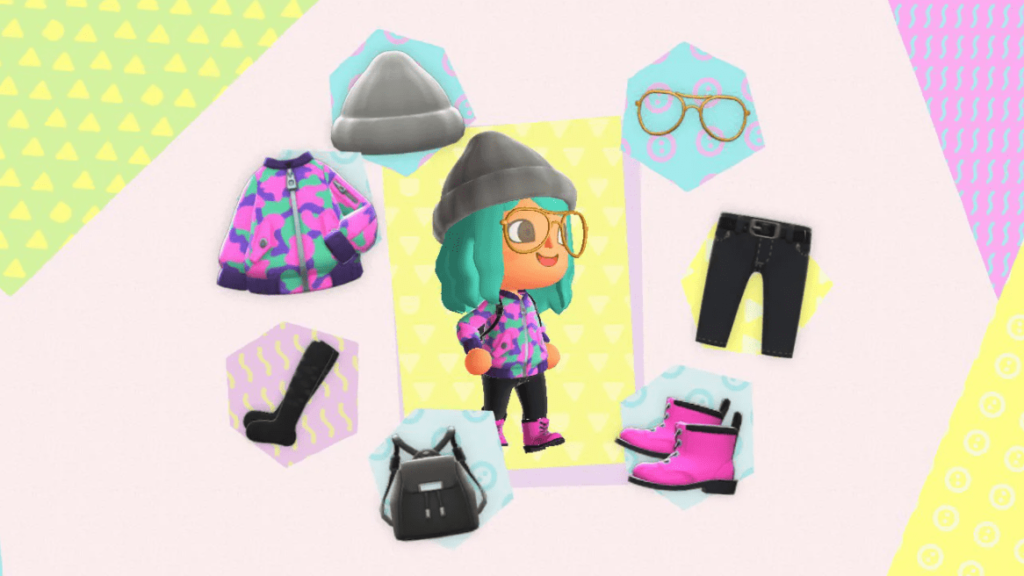
While New Horizons undeniably has the best fashion items and dressing interface of the franchise, there are plenty of customizable patterns that’ll help you tweak how your character looks. WIRED’s own Cecilia D’Anastasio used face paint and custom patterns to give her character cool eyebrows and crop tops. If you aren’t particularly pattern-savvy, you can use the kiosk in the tailor’s shop to download designs for clothing and paths. Check out Instagram for a huge collection of accounts that post cute designs every day. You can also use AC Patterns to find cool designs or create your own.
Improve Your Island Rating
To eventually reach a five-star island rating, it’ll take time and effort. You can check your island rating by speaking with Isabelle in Resident Services. Take her advice literally: If she says you need more fencing, you need more fencing. The same goes for decor. Does she say you need more decorations or more items you’ve crafted yourself? Pay close attention to the hints she gives.
You’ll need well-balanced furniture and deco items scattered throughout your island, as well as a certain amount of flowers, fencing, and trees. Be sure to pick up tree branches and weeds as soon as you see them—they drag your island rating down.
Spend Those Nook Miles and Visit Other Islands

Don’t be afraid of running out of Nook Miles. They start off as an achievement system, which gives the impression that they’re limited. Tom Nook will eventually upgrade your Nook Miles plan to Nook Miles+, which adds a series of five rotating, repeatable achievements that can steadily give you Nook Miles as you play. You won’t run out of Nook Miles, and you can easily grind for more using the upgrade.
This is useful in the early game when you want to collect iron nuggets to upgrade the Resident Services tent, and if you want more than just two other residents on your island. When Dodo Airlines opens, you can spend 2,000 Nook Miles for a Nook Miles Ticket. This ticket takes you to a new, smaller deserted island randomly generated in the game. The island has fresh rocks you can hit with your shovel to collect iron nuggets. Each rock can only be hit three times a day, so you’re limited on your own island with how many nuggets you can possibly get in a day. Going to new islands will get those nuggets pouring in.
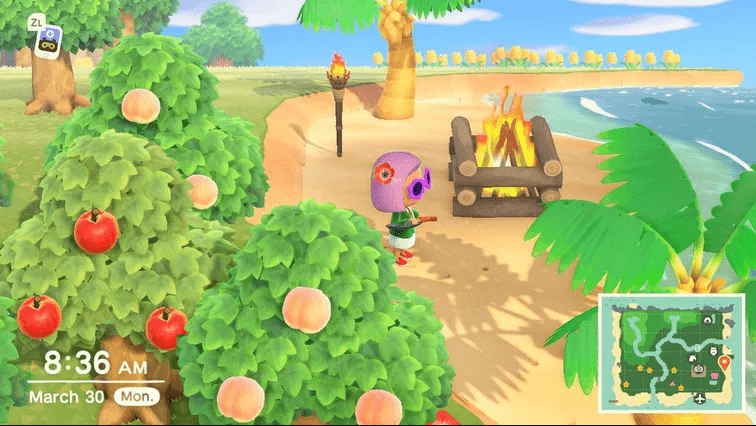
The other deserted islands also have different fruits you can collect, which help diversify your own island’s flora. You can get more wood, sticks, and flowers on the island, too. You can even meet new characters that you can invite to your island. You’ll discover a new animal friend if you find a campfire on the deserted island. Talking to them twice lets you invite them to your own island, growing the community.
Stay Vigilant
The world of Animal Crossing is chock full of little secrets to uncover for the curious and the patient. The beautiful, lush HD graphics make the treasures here feel even more subtle. So, keep your eyes peeled for glowing patches of ground, glistening spots on the beach, creatures that fly away if you startle them, or anything else that just seems off. You’ll almost always be rewarded for your investigation.
Avoid Getting Scammed by Redd
An update brought the nefarious trickster Jolly Redd to ACNH. He’ll show up occasionally on his boat, parked at the private beach on the very back of your island, and he’s got both art and furniture up for grabs. Be wary, though. During each visit, you’ll only be able to buy one of the available pieces of art, and all of them but one are fakes. Blathers won’t accept counterfeit paintings, so you need to be careful before committing to buy.
When you’re in Redd’s boat and checking out a piece of art, be sure to tell him that you want a closer look. This will shine a spotlight on the piece in question. You’ll be able to zoom in to check out the details. Sometimes they’re easy to spot—like a scowling Mona Lisa—but other times you’ll need to look closely to spot any forgery details. To save time and Bells, I use this guide to tell whether or not a piece of art is genuine.